
![]()

|
Jane's
Quick Tips
Tip 15 Inserting Movie Clips or Animated GIF |

|
Inserting Movie Clips or Animated GIF |
|
You can add movies and animated GIFs to slides from files on your computer, the Internet, or the Microsoft Clip Organizer.
Movie clips can include video capture from a camera, CD-Rom, QuickTime movies and the Internet. Video clips or "movie" files are desktop video files with formats such as: AVI, Quicktime, MPEG, and file extensions such as: .asf, .avi, .mov, .mpg, mpeg or .wmv. An animated GIF file includes motion and has a .gif file extension. Though not technically movies, animated GIFs contain multiple images which stream to create an animation effect. Once you insert the movie file onto the slide, there are several ways you can start it: have it play automatically when the slide displays; click it with the mouse; or create a timing for it so that it plays after a certain delay. It can also be part of an animation sequence. |
|
| Procedures to Insert Movie from File: | |
|
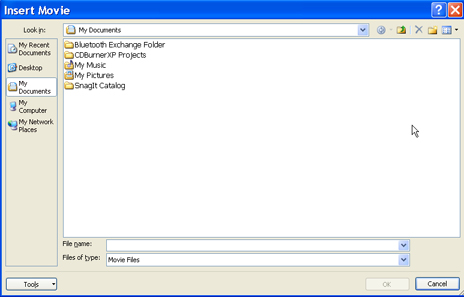
Display the slide to which you want to add music or sound effects. 1. Click on the Insert tab.
|
 |
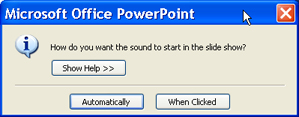
4. When you make your selection, a message is displayed asking whether you want to play the movie or GIF automatically or when you click on the movie.
|
 |
| Procedures to Insert Movie from Clip Organizer: | |
Display the slide to which you want to add music or sound effects.1. Pull down the Insert Menu. |
|
Please Note: Movie files are automatically linked to your file, rather than embedded inside it like pictures or drawings. When your presentation has linked files, you must copy the linked files as well as the presentation if you are going to be giving the presentation on another computer. |
|
| Adding a Movie from the Slide Layout Procedures: | |
|
|
Back to PowerPoint 2007 Quick Tips Index
This page was last modified
May 9, 2010
Address of this page is: http://hhh.gavilan.edu/jmaringer/PowerPoint2007/QuickTips2007/ppttip15.html